


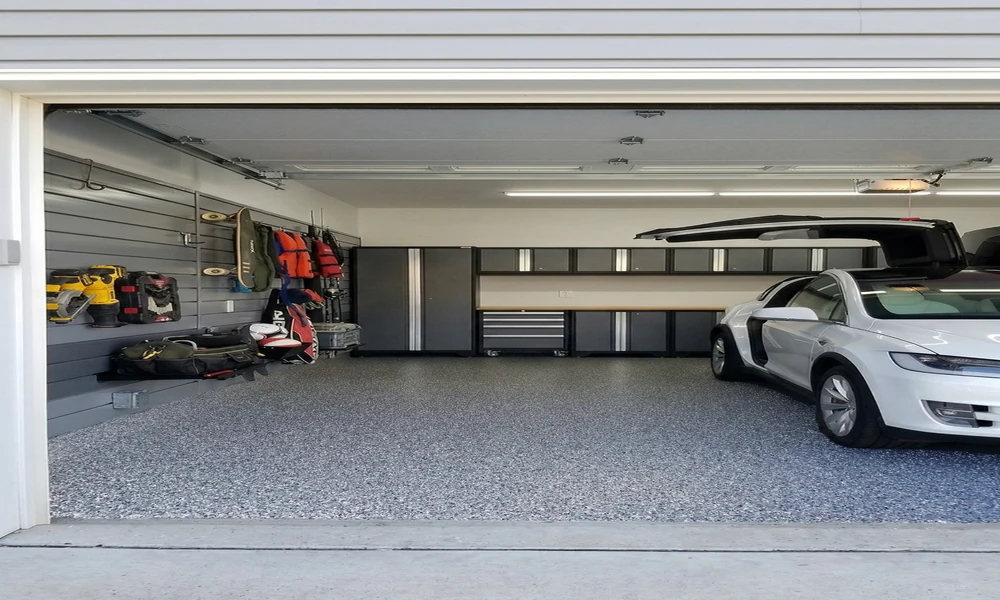
For a lot of homeowners, the garage starts with good intentions. There is a place for the car, a few shelves for tools, and maybe some room for bikes or lawn equipment. Then life happens. Boxes pile up, tools end up on the floor, and the concrete becomes stained and difficult to clean.
Eventually, the garage becomes the place where everything goes when there is nowhere else to put it.
A well-planned garage makeover can change that without necessarily turning the space into something complicated. The goal is to make the garage cleaner, easier to use, and better suited to how your household actually lives.
1. Start by Clearing Out the Garage
Before buying cabinets or choosing a floor coating, empty the garage as much as possible. This is one of the least exciting parts of the project, but it gives you a much better idea of what you are working with.
Create separate areas for things you want to keep, donate, sell, or throw away. Be honest about items that have been sitting untouched for years.
Once the garage is mostly empty, measure the space. Pay attention to where the vehicles sit, how the garage doors open, and where doors, windows, outlets, and electrical panels are located.
A simple measurement of wall length and ceiling height can help prevent problems later when planning cabinets or overhead storage.
2. Plan Storage Around How You Use the Garage
Good storage is usually the biggest difference between a garage that stays organized and one that becomes cluttered again.
Instead of buying random shelves, think about what you actually need to store. Lawn equipment may need floor-level storage, while seasonal decorations can often go overhead. Hand tools and smaller supplies are easier to manage with wall storage, pegboards, or slatwall systems.
Keep frequently used items within easy reach. Less frequently used belongings can go higher or farther toward the back of the garage.
Cabinet storage is also useful for keeping things out of sight. Closed cabinets can make a garage look much cleaner while protecting tools and other belongings from dust.
The important thing is to plan storage before filling the space back up. Otherwise, you may simply create a nicer-looking version of the same clutter.
3. Give the Concrete Floor Some Attention
The garage floor takes a lot of abuse. Cars bring in water, dirt, road salt, and chemicals. Tools get dropped. Oil and other fluids can leave stains.
If the existing concrete is in decent condition, a professional coating can make it easier to clean and give the garage a more finished appearance.
Epoxy, polyurea, and polyaspartic systems are common options. The right choice depends on the condition of the concrete, the expected use of the garage, and the installation system.
Surface preparation is especially important. A coating applied over poorly prepared concrete can have problems regardless of how good the coating material is.
If you are trying to estimate what a project might cost, look for an actual project calculator rather than relying only on generic price ranges. A calculator can give you a starting point based on the size and scope of your garage.
4. Improve Lighting and the Walls
A garage can feel dark and unfinished even when it has plenty of storage. Improving the lighting is one of the simplest ways to make the space more comfortable.
LED fixtures are a practical choice for most garages. Consider adding more than one light source so you do not end up with bright spots and dark corners.
The walls deserve attention too. A fresh coat of paint can make the garage feel noticeably brighter, especially if the existing walls are dirty or worn.
If you are planning wall storage, install it with the overall layout in mind. You do not want cabinets, shelving, or slatwall systems blocking switches, outlets, windows, or access to important equipment.
5. Think About the Garage as Part of the Home
A garage is often treated as an afterthought, but homeowners use it for much more than parking cars. It can be a workshop, a place for hobbies, a storage area, or simply an organized transition between the outside and the home.
That means the makeover should reflect your daily routine.
For example, a family that uses bicycles regularly may want easy-access bike storage near the garage door. Someone who spends weekends working on cars may need a durable floor and dedicated tool storage. A homeowner focused on organization may get more value from cabinets and overhead storage.
There is no single layout that works for every garage.
If you want to see how different upgrades can come together in one project, this example from a garage makeover company shows how flooring, storage, paint, and other improvements can be combined into a complete garage renovation.
6. Finish the Makeover With a Maintenance Plan
The best garage makeover is one that still looks good a year later.
Once everything is installed, make a habit of putting tools and equipment back in their designated locations. Avoid using empty floor space as temporary storage because temporary storage has a way of becoming permanent.
Clean the floor regularly and deal with spills as soon as possible. Check cabinets and wall storage occasionally to make sure they are not becoming overcrowded.
It is also worth leaving some open space. A garage does not need to be filled from wall to wall to be useful. Having room to move around makes the space more functional and gives you flexibility if your storage needs change.
For homeowners planning a larger project, Orga Spaces garage solutions can provide ideas for combining flooring, cabinets, wall storage, and other garage improvements into one organized space.
A Garage Makeover Does Not Have to Be Complicated
A successful garage makeover starts with a simple question: what do you want the garage to do for you?
Once you answer that, the rest becomes easier. Clear out what you do not need, plan storage around your habits, improve the floor and lighting, and make sure every upgrade works with the layout of the space.
You do not have to renovate everything at once, either. Even a few well-planned changes can make a garage cleaner, more functional, and much easier to live with. The key is to focus on practical improvements that will continue to be useful long after the project is finished.