
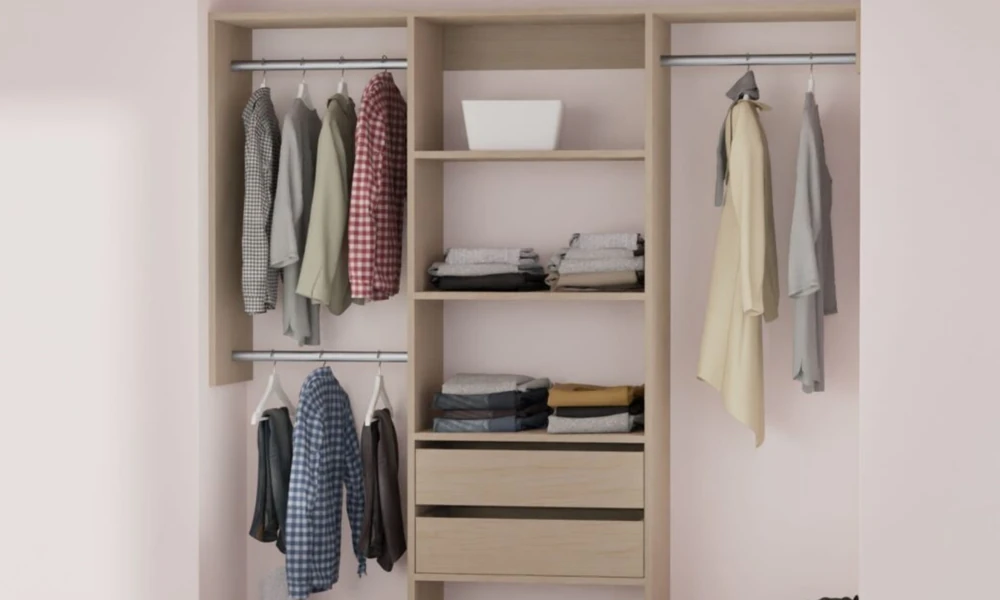
You already know what a reach-in can do for a room. My job here is to help you choose features that work every day, fit New Zealand homes, and install without stress. I focus on simple layouts, proven hardware, and upgrades that give real gains in capacity and speed. If you are comparing options for built in wardrobe storage, the ideas below will help you decide what to include and what to skip.
I base these picks on practical design rules, common NZ room sizes, and how people actually use their space. You will see where to put drawers, how to split hanging zones, and which add-ons make the biggest difference.
Start With a Simple Plan
Before you choose parts, map three things.
- Space: Measure width, height, and depth. Note door type and swing. Most NZ reach in wardrobes sit around 550 to 600 mm deep.
- Clothing: Count long items, everyday tops, folded knits, shoes, and accessories.
- Zones: Aim for a tower in the middle or to one side, with hanging either side. Keep drawers at mid height for easy reach.
If you keep this simple structure, most built in wardrobes nz will feel tidy and fast to use.
Core Features I Recommend In Reach-In Wardrobes
These items give the best return in a built in wardrobe nz, especially in tight rooms.
- Double hanging for tops and pants
Use two rails stacked. Plan roughly 900 to 1000 mm per section. This nearly doubles capacity compared to a single long rail.
- One long hanging bay
Keep 1200 to 1500 mm of height clear for dresses, coats, and long skirts. You need only one of these in most reach in wardrobes.
- Adjustable shelving
Go with 300 to 350 mm spacing for folded clothes and bags. Flex matters as seasons change.
- A 3 to 4 drawer tower
Drawers handle small items and daily wear. I like top shallow drawers for underwear and accessories, then deeper drawers below for knits and gym gear. Place the top drawer around hip height.
- A full-length top shelf
Run a continuous shelf above hanging. This makes bulky storage simple and keeps visual lines clean.
- Shoe storage that fits your style
Flat shelves suit boots and mixed pairs. Pull-out trays help if you rotate a set of favourites. Aim for 6 to 8 pairs in reach.
- Solid side panels and a fixed tower
A stable tower anchors rails and keeps everything square. This pays off during DIY.
Smart Add-Ons That Punch Above Their Weight
Small upgrades make daily use smoother.
- Pull-out pants rack for work clothes
- Divided accessory trays for belts, ties, and watches
- A pull-out hamper near the bottom of the tower
- Valet rail for planning tomorrow’s outfit
- Extra mid-height shelf for handbags
- Door-mounted hooks for quick grabs
Keep add-ons to what you will use each week. Too many can slow you down.
Layouts That Work In NZ Bedrooms
Use these as a quick guide for wardrobe systems nz. Adjust to your room width.
- 1200 mm wide
One drawer tower at one side, single long hang on the other, plus a top shelf.
- 1800 mm wide
Drawer tower in the centre, double hanging both sides, top shelf across.
- 2400 mm wide
Centre tower with drawers and shelves, one long hang bay on one side, double hang on the other, shoe shelves under the long hang.
These setups hit a sweet spot for capacity and access in reach in wardrobes.
Why I Recommend Kitset Wardrobes
If you want a built in wardrobe organiser that is easy to plan and install, Kitset Wardrobes stands out in New Zealand.
- They focus on cost-effective, modular flat-pack systems that suit reach-in and walk-in layouts.
- Pre-designed units get you started fast, and custom wardrobe systems are available if you have exact measurements.
- Oversized shelves and rails can be trimmed on site, which makes tight NZ alcoves simple to fit.
- Their online 3D planner helps you test ideas before ordering.
- Orders ship nationwide with clear instructions for DIY.
- Quality and support have a strong reputation across homeowners and trade.
If you want wardrobe storage solutions nz without the price of full custom joinery, they are a strong option to consider.
DIY Install Tips That Avoid Regrets
- Mark studs and fix towers and rails into solid points.
- Set the tower first, then cut rails and top shelf to fit.
- Check level and plumb at every step.
- Leave clean door clearances for sliding or hinged doors.
- Pre-drill to avoid splitting, and use the right screws for studs or masonry.
- Plan cable paths if you will add LED strip lighting later.
Common Mistakes To Skip
- Too much single long hanging
It eats space. Keep a single bay and double-hang the rest.
- Drawers at floor level
Hard to reach and awkward. Keep the top drawer near hip height.
- Fixed shelves only
Seasons change. Use adjustable holes.
- No plan for shoes
Piles on the floor waste depth and block access.
- Ignoring door type
Sliding doors need clear centre access. Hinged doors need swing space.
Quick Shopping Checklist
Final Thoughts
A good built in wardrobe organiser does three things. It gives you more capacity, speeds up your morning, and stays flexible as life changes. Keep your layout simple. Choose double hanging, one long hang bay, a solid drawer tower, and adjustable shelves. Add only the extras you will touch each week.
For reach in wardrobes and built in wardrobes nz, Kitset Wardrobes offers a practical path. Their modular reach-in range, custom options, and DIY focus make planning and installation straightforward. With the right features in place, your wardrobe will feel calm, ordered, and easy to live with.